|
Adding a client and entering a sale

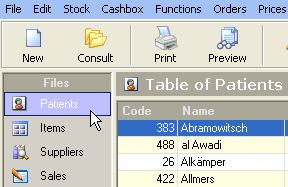
1. Activate the client database
Ensure that the database is activated. If it is not, click on it in the list of databases:
2. Create a new record
Click on the button New in the tool bar. You can also select this option from the File menu. It is also possible to select this option from the file menu with the F4 function key

3. Complete the form
An empty form appears. You just need to complete it. Type Enter or Tab to go to the following field, or use the mouse. For some data, such as the first name or the city, the computer proposes a list from the data it already has.
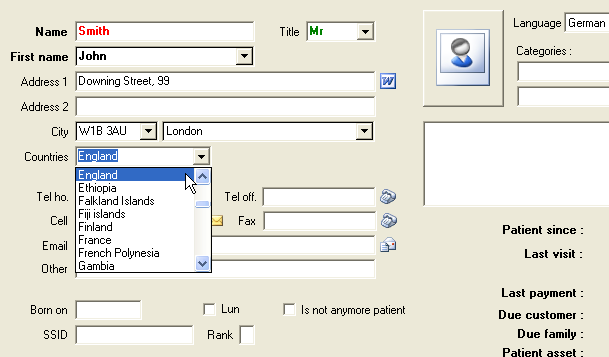
When the form is completed, click on Save to save the record in the database.
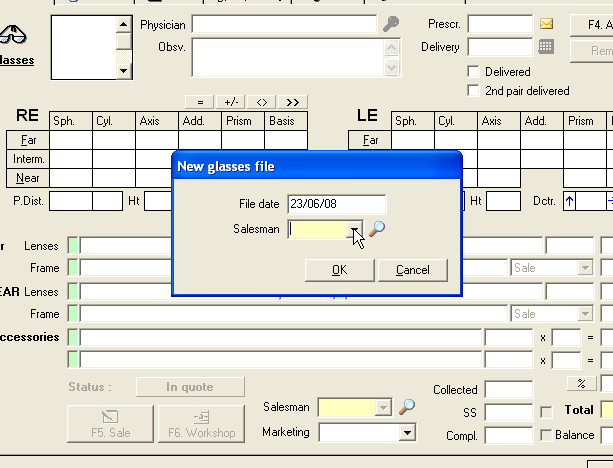
4. Open the record Optometry
To input the visit and the sales, click on Optometry. The record Optometry keeps track of all visits done by the client to the store. The computer proposes the current date by default, but you can put the date of your choice.
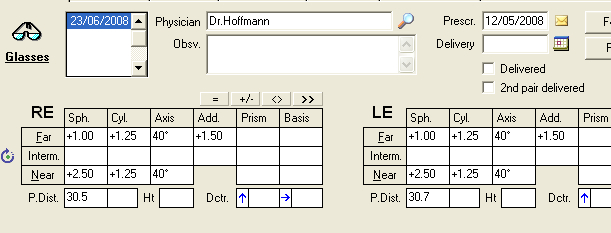
Then introduce the practitioner, the dioptres for the eyes, pupil interval, remarks, and shift data. Data are not mandatory.
5. Input the sales data
Now you need to indicate the lenses and the frame that your client has chosen. You can introduce two references, one for far-sighted and one for short-sighted. You can introduce two far-sighted and two short-sighted by clicking on the button Interm of the dioptres.
Selection of the lenses
If you have introduced lens prices, you can recall it when the cursor is inside a lens field by typing F12. The computer will then propose all available lenses for this client. Make your choice from the list and select the possible supplements. If you need to order this lens from your supplier, you can tick the corresponding box in order for the lens to be included in the order slip :
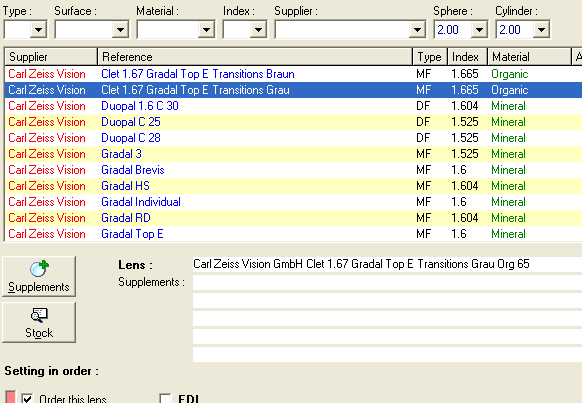
Once the lenses have been selected, click on Select and the chosen lenses will be displayed on the client record for each eye together with their prices and the total amount. Lenses on order are marked with a red square :

If you don't have lens prices, you can select a lens from your stock by introducing its code in the lens field and by typing Enter. You could also indicate manually the reference of the lens and its price.
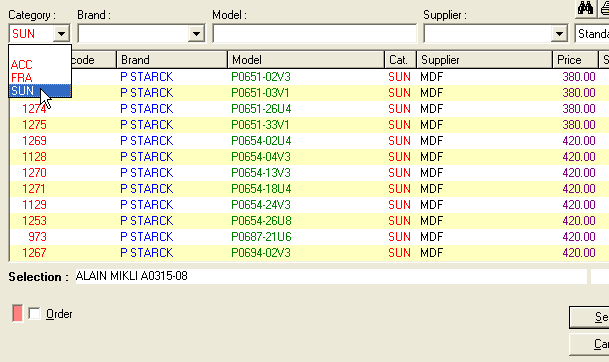
Selection of the frame
To select the frame, introduce its item code (which you will find on the frame's label, if you have printed them) and type Enter .
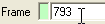
If the code is correct, it will be replaced by the frame's reference and its price :

If you don't know the code, you can visualize the inventory by typing F12 and you can select the frame from the list. You also have the option to input a reference manually but in this case no link will be done with the inventory. Like for lenses, you can tick the square Order if necessary. It is also possible to enter a code manually but in this case it will not be deducted from the stock :
Selection of the accessories
You now have to introduce the accessories, if applicable (cases, cleaning products, labour, etc.). As for the lenses and frame you can either type the item code and type Enter or visualize the selection screen by typing F12.
It is also possible to select a quantity for the accessories :

Discount
You have the possibility to offer a discount to your client by clicking on the button
 located above the prices. You can either indicate a percentage discount or a specific value for each row :
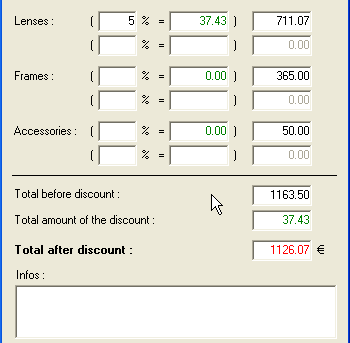
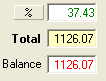
The discount is displayed in the corresponding cell and the total amount is also indicated.
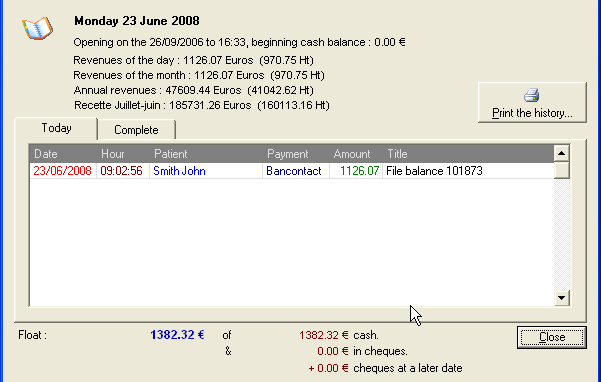
6. Collect the money
When the sale is completed, you can collect the client's payment. Collecting is not mandatory and can be done at any time.
Click on the sale button or type F5 button to sum up the different items purchased by you patient, the third party payment, discount…
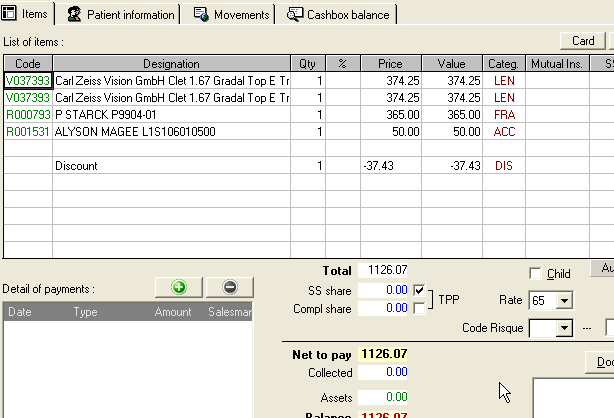
By default the amount proposed corresponds to the total amount of the sale. Introduce the amount of the down payment and click on Record. But the client will be added to the list of outstanding debts as long as his balance remains positive.
It is possible to make a staged payment. Each time you collect an amount, you will just need to introduce the amount cashed. All amounts are detailed in the cashbox history.
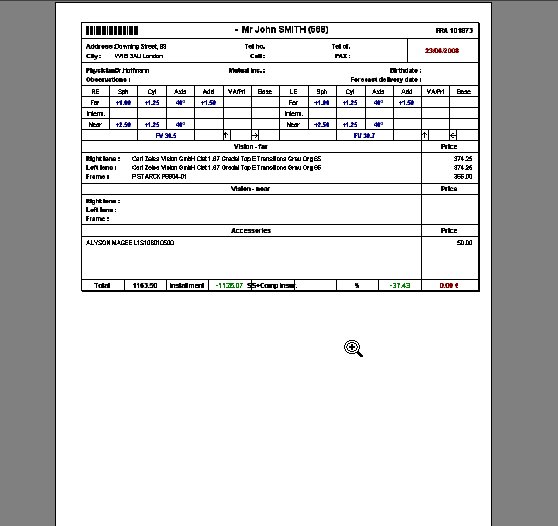
7. Print the documents
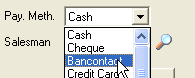
When the money has been collected, it is possible to print various types of documents for you and the client. By Clicking on Document button in the cashbox you may print directly some documents.
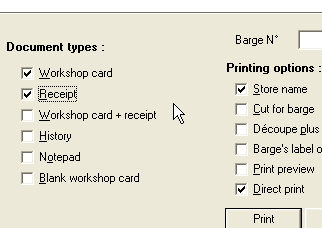
It is possible to check the preview box in order to visualize on the screen, before printing
That’s all the sale is confirmed, you have just to close the card by clicking on the corresponding button.
For more information about the patient cards and the sales, see the corresponding points in the user manual.
|


